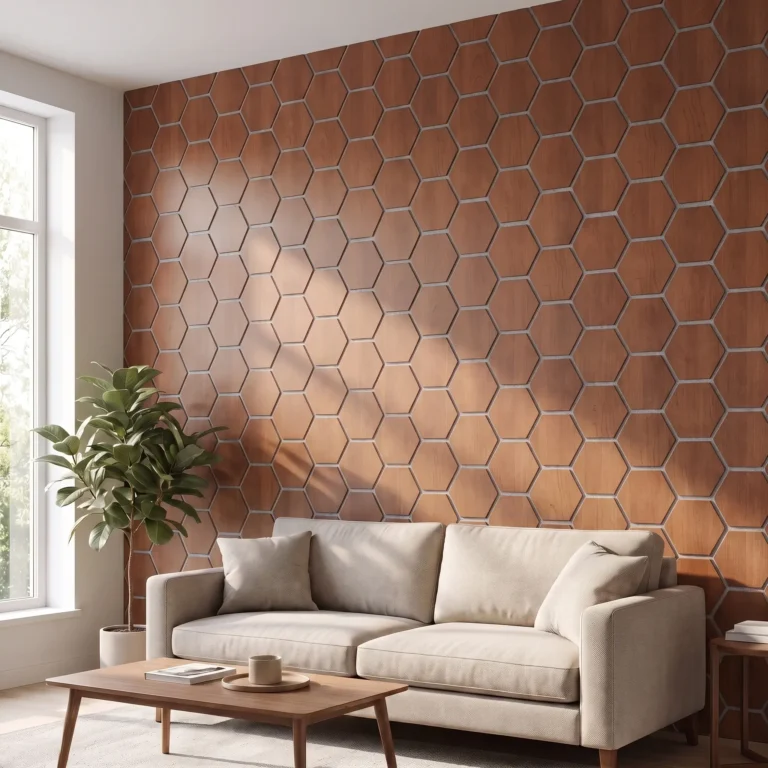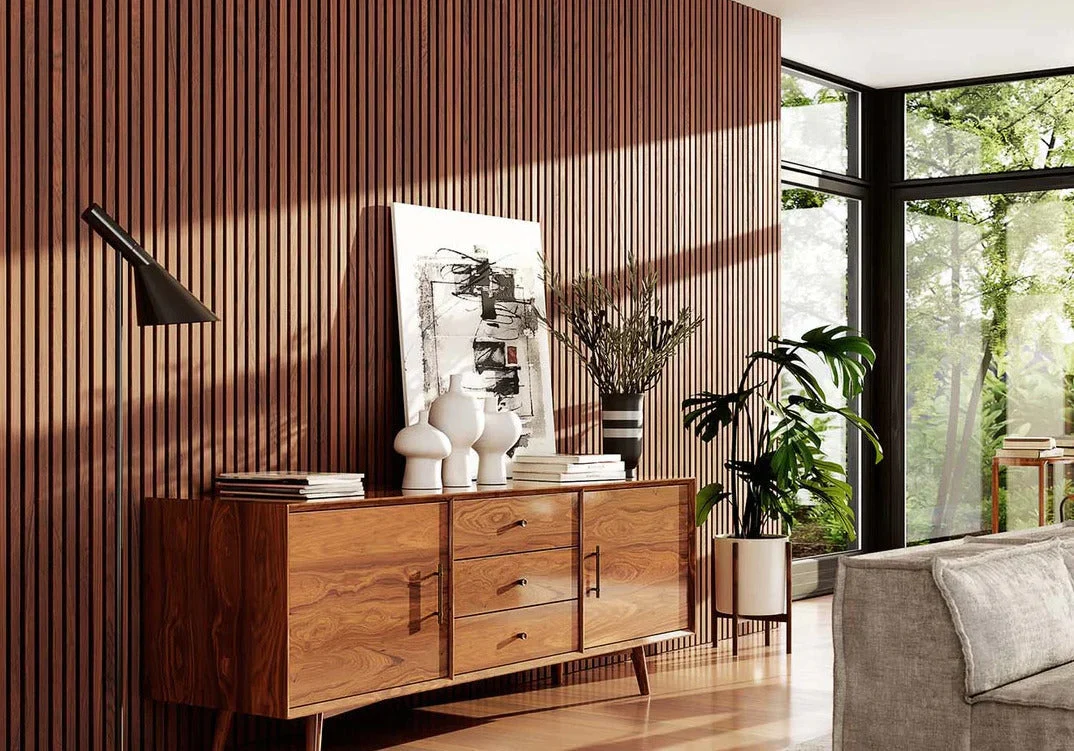

Walnut wall panels turn a flat living room wall into the room’s focal point without a full renovation — walnut wall panels from AKU Wood Panel install over drywall in an afternoon, pair with real wood veneer for a grain pattern that doesn’t repeat, and work with either vertical or horizontal slat orientation depending on ceiling height. This guide walks through measuring, cutting, mounting, and styling a walnut slat wall for a 2026 living room that reads modern, not rustic.
Walnut has become the default choice for homeowners who want a feature wall with warmth but not the orange undertone that oak sometimes throws into a room. This guide covers the full process — planning the layout, choosing orientation, cutting panels to fit your wall, mounting them, and styling the furniture and lighting around the finished panel. Every step below assumes a standard drywall living room wall with no structural obstacles, with notes for common variations like outlets and uneven corners.
What you’ll need
- Walnut wall panels (real wood veneer slat panels, like the ones AKU Wood Panel carries)
- Tape measure and a pencil
- Stud finder
- 4-foot level or laser level
- Construction adhesive or mounting clips (check manufacturer instructions for your panel type)
- Fine-tooth saw or jigsaw for cutting panels to width
- Caulk gun (if using adhesive)
- Painter’s tape to mark layout lines before committing
Step 1: Measure the wall and sketch your layout
Start by measuring the full width and height of the wall, including any outlets, switches, or trim you’ll need to work around. This step determines how many panels you need and whether you’ll end with a full-width slat at the edge or a cut piece.
Measuring wrong here cascades into every later step, so double-check before ordering. Mark the wall’s center point with painter’s tape — most feature walls look best when the panel layout is centered rather than starting flush from one edge, especially behind a sofa or TV console.
The common mistake at this stage is skipping the sketch and eyeballing it on the wall. A 10-minute drawing on paper, with panel widths marked out, catches layout problems before you’ve cut a single piece of walnut.
Step 2: Choose vertical or horizontal orientation
Orientation changes how the room reads more than almost any other decision in this project. Vertical walnut slats draw the eye upward and make a standard 8-foot ceiling feel taller, while horizontal runs widen a narrow living room and suit lower, more contemporary ceiling heights.
For a deeper breakdown of when each direction works best, the guide on positioning wood slat panels horizontally vs vertically walks through both scenarios with real room examples. Most 2026 living room installs still default to vertical because it pairs cleanly with a TV-mounted feature wall, but open-plan rooms with low ceilings often look better horizontal.
Expected outcome: a decided orientation marked on your sketch before you touch a saw. The mistake to avoid is changing orientation mid-install because the panels were pre-cut for one direction and don’t adapt well to the other without rework.
Step 3: Cut panels to fit your exact wall width
Most walls aren’t an exact multiple of standard panel width, so at least one panel per row will need trimming. Using a fine-tooth saw keeps the walnut veneer from splintering along the cut edge.
Measure twice against your sketch from Step 1, then cut the end panels first so any slight inconsistency lands at the wall edge rather than in the middle of the design. The guide to cutting acoustic wood slat panels to size covers blade choice and cutting technique in more detail, which matters more with real veneer than it does with laminate finishes.
The outcome here is a full set of panels, pre-cut and dry-fit against the wall before any adhesive comes out. Skipping the dry fit is the single most common install mistake — it’s much easier to adjust a cut now than to pull a glued panel off drywall later.
Step 4: Mount the panels to the wall
This is the step that determines whether your walnut wall panels stay flat and straight for years or start bowing at the edges within months. Locate studs with the stud finder and mark them along your layout line, since anchoring into studs (or using the right adhesive for drywall when studs don’t align with your layout) keeps panels secure under real-world humidity changes.
Start from your centered reference line from Step 1 and work outward, checking level every two to three panels rather than only at the start. For drywall installs without direct stud access, theguide on installing acoustic slat wall panels on drywall walks through adhesive selection and cure time.
Expected outcome: a flush, level panel wall with consistent gaps between slats. The common mistake is rushing adhesive cure time — pressing panels and moving on before the manufacturer’s recommended set time causes visible gaps once the adhesive fully cures.
Step 5: Add lighting to highlight the grain
Walnut’s grain pattern is the whole point of choosing real wood veneer over a printed laminate, and raking light across the surface is what makes that grain visible at night. A slim LED channel mounted along the top or side edge of the panel wall throws shadow lines across each slat that a single overhead fixture can’t replicate.
Theguide on adding lighting channels to slat wall panel installations covers channel placement and wiring options for both hardwired and plug-in LED strips. Warm white light (2700K-3000K) reads as more natural against walnut tones than cooler daylight bulbs, which can wash out the reddish-brown depth of the wood.
The mistake to avoid: mounting a bright, cool-toned light directly facing the panel instead of raking it at an angle — direct light flattens the grain instead of accentuating it.
Step 6: Style the room around the panel wall
Once the walnut wall panels are up and lit, the furniture and decor choices either support the feature wall or compete with it. Keep the sofa, rug, and coffee table in a limited, complementary palette — black, cream, or deep green upholstery tends to let walnut’s warm brown tones stay the focal point rather than fighting another strong wood tone in the same sightline.
Avoid placing a second large wood furniture piece (like a mixed-tone media console) directly against the panel wall, since two different wood species side by side often clash rather than complement. A black or matte metal TV console, by contrast, reads as neutral against walnut and keeps the wall as the clear focal point.
Common mistakes and fixes
Panels look too dark in a north-facing room. Walnut absorbs more light than oak or ash, so a room with limited natural light can feel heavier than expected. Add a second light source at a different angle, or pair with lighter-toned furniture and a pale rug to balance the room.
Gaps appear between slats after a few months. This usually points to incomplete adhesive cure during Step 4 or panels mounted in a room with significant humidity swings. Reset the affected panel with fresh adhesive and allow full cure time before resuming normal room humidity.
Orientation looks off once furniture is placed. If a vertical wall feels too busy behind a tall bookshelf, horizontal slats behind lower furniture often read calmer. This is worth testing with painter’s tape mockups before cutting, not after.
Panel color doesn’t match existing wood trim. Walnut tones vary by batch due to natural grain variation. Ordering a sample before committing to a full wall avoids a mismatch that’s expensive to fix after installation.
Tools and resources
- Walnut wall panels – AKU Wood Panel’s slat panels use real wood veneer, which is the detail that makes grain-highlighting lighting (Step 5) worth the effort; laminate alternatives won’t show the same depth.
- Stud finder – any basic model works for locating mounting points before Step 4.
- LED channel strip – needed for Step 5; look for dimmable, warm-white options.
- For cost planning before buying panels, the wood wall panels ranked by price per square foot breakdown is a useful starting point for budgeting the full wall.
FAQ
Do walnut wall panels need professional installation?
No — the steps above are designed for a DIY install over standard drywall with basic tools. Walnut wall panels from AKU Wood Panel are sized for manageable handling by one or two people, though a second set of hands makes leveling easier on taller walls.
Can walnut wall panels go in a small living room?
Yes, and in many small rooms they work better than paint because the vertical or horizontal line of the slats adds visual structure without adding bulk. Horizontal orientation tends to suit narrow rooms best.
How do I know how many walnut wall panels I need?
Measure total wall width and height from Step 1, subtract any window or door openings, then divide by the panel width listed for the specific walnut wall panels you’re ordering.
Will walnut wall panels clash with existing oak flooring?
Not usually — walnut and oak are a common pairing in 2026 interiors because the contrast in tone (walnut darker, oak lighter) reads intentional rather than mismatched, as long as the rest of the room’s wood tones stay limited to those two.
Do walnut slat panels help with room acoustics?
If the panels are acoustic slat panels (felt or foam backing behind the slats), they reduce echo in rooms with hard flooring and high ceilings. A standard decorative-only panel without backing provides the visual effect but limited sound absorption.
Conclusion
A walnut slat wall is one of the few living room upgrades that changes the entire feel of a space without touching the floor plan. Measure carefully, pick an orientation that matches your ceiling height, mount with patience through the adhesive cure, and finish with raking light to let the grain do the work. Walnut wall panels remain one of the more forgiving feature-wall materials to install yourself in 2026, provided the dry-fit and leveling steps aren’t skipped — the difference between a flat, straight wall and a wavy one comes down entirely to those two steps.